|  Table of contents Table of contents | | |
|
| | |
|
- Presentation
- First Steps
- Browser
- Looking at information
- Ordering Parts
- Manage your client account
- Real driving emission
- New registration
| |
| | |
|
Presentation
Service Box
| Service Box | | |
|
| | |
| The Service Box website gives access to vehicle information by way of various documentation (technical documentation, diagrams,...).
Service Box also allows you to order your parts on-line in a simple and interactive way
Registration is free and gives you direct access to numerous information
| |
| | |
|
First Steps
Pre-requisites
| Access
:
Prerequisites and technical recommendations | | |
|
| | |
| The technical recommendations for ensuring good quality service when using SI STELLANTIS
,
relate to
3
aspects
:
1.
The Internet connection speed used by the garage.
2.
The type of computer
(
work station
)
to be made available to the user
(
Sales Advisor
, …)
3.
The browser
/
used to access the SI STELLANTIS
1.
Internet connection speed used by the garage
The response times of the SI STELLANTIS
(
Service Box
,
Diagbox
, …) ,
depend on the Internet connection speed available at the user's workstation
(
Sales Advisor
, …)
for these IS.
.
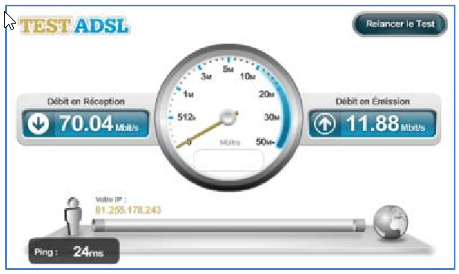
How to measure the Internet connection speed
1.
Log on to the computer of the user connecting to SI STELLANTIS.
2.
Open up a browser session
(
Microsoft IE
)
3.
Connect to a website that allows you to measure the actual connection speed
,
for example
:
www.testadsl.net/test-debit.html
4.
Run the test.
5.
The results show both the download and upload speeds.
Example of results
:
Interpretation of results/Recommendation
|
Download speed
(débit descendant ou download)
|
|
Upload speed
(débit montant ou upload)
|
|

|
Less than
1
MB
/
ed
|
Or
|
Less than
0,2
MB
/
ed
| Speed too low to use Service Box properly.
Very high risk of disruption and time-out.
Internet upgrade required
|

|
Between:
1 & 3
MB
/
ed
|
and
|
Between:
0,2 & 0,5
MB
/
ed
| Speed could result in inadequate response times when using Service Box.
Internet upgrade required
|

|
More than
3
MB
/
ed
|
and
|
More than
0,5
MB
/
ed
| Speed sufficient to use Service Box with response times approaching STELLANTIS benchmarks.
No Internet upgrade required.
|
Note
:
the overall connection speed required by the garage from its Internet Service Provider
(
FAI
)
depends on the number of computer workstations and on what they are used for.
.
The speed available on the SI STELLANTIS user's workstation must be measured when the various workstations at the garage are in nominal use.
.
It is recommended to take several measurements at different times
,
to check that the available connection speed is comparable from one measurement to the next.
.
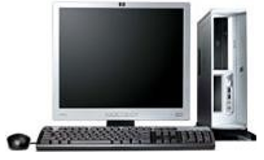
2.
Type of computer
(
work station
)
Response times also depend on the type of computer used.
.
For optimum performance,
,
the specifications of the user's
(
Sales Advisor
, …)
workstation must be higher than or equal to the following:
:
Processor frequency
≥
3. 3 GHz
RAM
≥
8 Go
3.
Browser used to access SI STELLANTIS
Service Box can be used
(
Microsoft Internet Explorer
,
Mozilla Firefox
,
Google Chrome
)
with most Internet browsers on the market.
.
However,
,
at present
(
2018
) ,
the system has only been proven to work optimally with
:
Microsoft Internet Explorer v11.
.
It is therefore recommended to use
,
version 11 of this browser
.

Note
:
SAGAI
(
web
)
constitutes
,
for the moment
,
an exemption to this recommendation
;
the currently usable browser is version IE9 of Internet Explorer.
.
To access
,
this SI, we therefore recommend configuring one of the workstations with a IE9 browser.
.
For information
,
A study is underway to enable use of SAGAI
(
web
)
with IE11 as well.
.
We will keep you informed of the corresponding timeframes.
.
| |
| | |
|
Choose the display language
| Choose the display language | | |
|
| | |
| In order to obtain information in your own language, adapted to your country, you may choose your display language in two different ways:
-
On the login page, by selecting a language in the menu list at the top right of the page
-
Whilst navigating throughout the website, make your way to the link 'My profile' (at the top right of the website)
| |
| | |
|
Logging on
| Methods of access to the site | | |
|
| | |
| To access the Service Box website you must have a valid user ID and password.
You must get your logon codes whilst registering for free on the site
| | |
| For more information on registering, refer to the 'Registration' help in the 'First steps' chapter.
| |
| | |
| |
| | |
|
| If you are already registered | | |
|
| | |
| You must enter your client code and your password in the required fields, in the middle of the login page.
| |
| | |
|
| If you have lost your login codes | | |
|
| | |
| Follow the steps described below:
-
Click on the link "If you have lost your logon codes, click here.
" on the login page.
-
The page for recovery of codes opens
-
Enter the email address used for your client account.
If you haven't modified your personal details, your email address will be that which you entered during registration
-
If you have entered a valid address, you will receive by email, your client code and a new password.
If you have entered an invalid or unknown address on our website, an error message is displayed, you must then click on the 'Return' button and enter your correct address.
| |
| | |
|
Registering
| Accessing registration | | |
|
| | |
| The link to the registration page can be found under the connection field in the middle of the login page
Registration involves 4 steps which must be followed in succession
If you shut down your computer or close your Internet page during registration, registration will not be successful
You must re-start the process
Before continuing with your registration, please bear in mind the information concerning the site contents, tariff and payment, the legal references aswell as the general conditions of sale.
These documents are available on the login page, on the right of the screen
| | |
| Registration for the site is totally free.
| |
| | |
| |
| | |
|
| First step:
Choose your profile | | |
|
| | |
|
| | |
| If you are a professional or if you are registering in your professional capacity we advise you to choose your profile carefully, your parts ordering will be made much easier
| |
| | |
The different actions to allow you to choose your profile are as follows:
-
Click on the button which corresponds to your profile.
-
The button turns black
-
Click on the 'Validate' button to go to the next step
You have to choose from the 3 profiles on offer :
-
Auto-repairer professional
if your profession is that of auto repairs
-
Other auto professional
if your profession relates to autos, but you are not a repairer
(
e.g.
equipment supplier
).
-
Other professional
if your profession is not in autos, but you need to access the services in our Internet site
(
e.g.
students, agencies, big fleets
).
| |
| | |
|
| Second step
Completing the registration form | | |
|
| | |
| You must attach particular importance to filling in the form
The email address that you have given us will be used in order to send you your logon codes aswell as your invoices if you use the chargeable services
Your physical address will be used for the printing of your invoices
We recommend european professionals to fill in their inter-community code
It is also recommended that french professionals enter their SIRET number
| | |
| A single client account cannot be opened by email address
| |
| | |
The various steps necessary to complete the form are as follows:
-
Click in the field to be completed and enter the corresponding information
The required fields appear in grey, but it is recommended that all of the fields are filled in.
-
Do the same for each piece of information requested
-
Click on the 'Validate' button to move to the next step
If the information entered does not correspond to our verification criteria, an error message will be displayed at the top of the page
You will also need to correct any incorrect fields and click again on the 'Validate' button
| |
| | |
|
| Third step:
Validation of a registration form | | |
|
| | |
| A new page is displayed with a summary of the information you have entered.
-
If the information is correct, continue with the registration by clicking on the 'Validate' button
-
If the information displayed is not correct, click on the button 'Cancel' in order to correct the incorrect fields.
| |
| | |
|
| Fourth step:
Registration confirmation | | |
|
| | |
| A message confirming your registration is displayed
At this stage, an email containing your logon codes is sent to you
You can get to the login screen by clicking on the link 'To access Service Box, please return to the login screen by clicking here.or click on the link 'Return to login page' at the top right of the screen, in order to connect.
Enjoy your visit
!
| |
| | |
|
Browser
Configuring Internet Explorer
| Automatic configuration | | |
|
| | |
| In order to use Service Box with Internet Explorer 9 or later, the browser settings must be configured
.
To carry out this configuration, simply click on the following link
:
Configuration of the browser
.
Save the file on your computer
.
Then double-click on it to start it up
.
Once the update has been carried out, a dialogue box opens indicating that the installation is complete
.
| |
| | |
|
| Browser error messages | | |
|
| | |
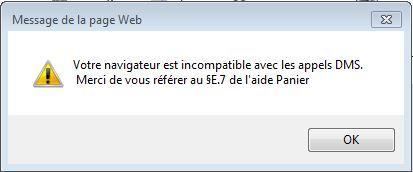
| If the browser is not configured you may encounter the following error messages
:
1 –
Error message
«
Your browser is not compatible with calls to the DMS
».
2 –
Warning message
«
Only the secure content is displayed
».

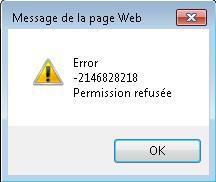
3 –
Error message
«
Error – 21468218 Permission denied
».
| |
| | |
|
Configuring Firefox
| Configuration of Firefox 3.6 and later to authorise DMS calls | | |
|
| | |
| This guide aims to authorise the browser to contact the DMS in the Basket application through the FireFox browser.
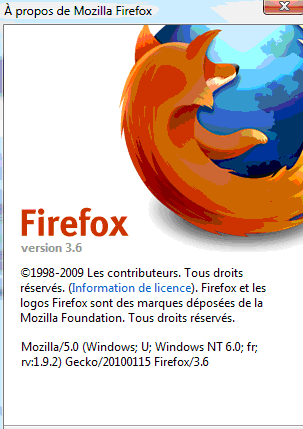
The screens below are from FireFox 3.6.
The configuration also works in FF 4, the reference version which can be downloaded from the Firefox site. (http://www.mozilla-europe.org)
Operating mode
:
1)
Check the version of Firefox
.
-
click on the question mark, on the right on the toolbar
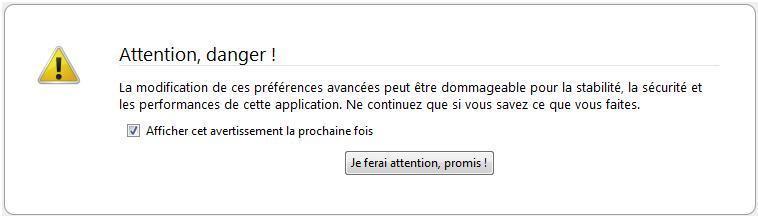
2)
Enter in the address bar: about:config
-
validate the message
:
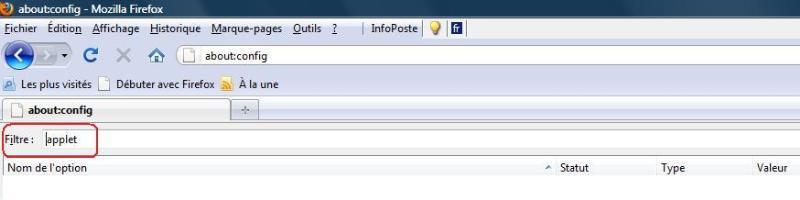
3)
Enter in the address bar: applet
4)
Double click on the line
:
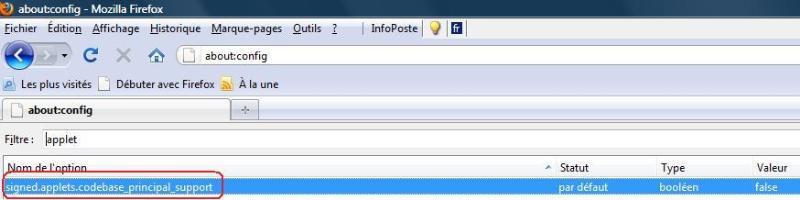
The line changes to bold and the value of the boolean changes from false to true.
5)
On the Basket screen, click on "costing" in an open dossier.
A warning message appears, tick "remember this decision" and click on "authorise".
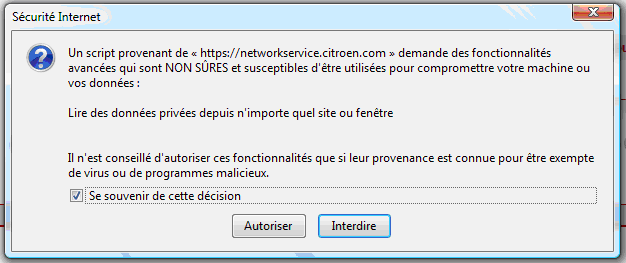
The warning will not appear again.
You can use "contact the DMS" in the Basket application.
| |
| | |
|
Looking at information
Access to the free services
| Access to the free services | | |
|
| | |
| The free services contain various documentation to which you can have access as soon as you have registered.
This documentation is totally free, no subscription is necessary to be able to use it.
List of free documentation :
- Spare Parts
- Accessories
- Products for professionals
- Catalogue of standard bolts, nuts and connections
- Vehicle documentation
- Location of sockets for diagnostics
The various steps required to access the free services are as follows:
-
From any page on the website, place your cursor on the 'Free Services' tab.
-
A menu list appears with the list of free documentation available.
-
Click on the documentation that you wish to look at.
| |
| | |
|
Accessing subscription services
| Conditions for accessing subscribed services | | |
|
| | |
| The subscribed services group together all of the documentation reserved for those users having a paid subscription.
If you have not signed up to a subscription or it has expired, padlocks are displayed in front of the access documentation links.
If you select a locked document, you will automatically be redirected to the subscription page.
| | |
| You may look at the history and the current state of your subscriptions.
For more information, go to help 'Consult the history of your subscriptions' in the section 'Manage your client account'.
| |
| | |
| |
| | |
|
| Accessing the subscription page | | |
|
| | |
| For certain documentation, the subscription can be applied for directly on-line, for some others, it is necessary to complete and resend an order slip
The various actions required to access the subscription page are the following:
-
Place your cursor on the subscription tab
-
A menu list appears with the available chargeable documents listed
-
Select the documentation you wish to subscribe to
-
The subscription page relating to your documentation opens
| |
| | |
|
| Subscribing on-line | | |
|
| | |
| Each subscription corresponds to the time period for which you can freely access the information (it does not relate to the duration of connection).
The date retained for the start of your subscription will be that of your first consultation of one of the chargeable elements of the site.
The various steps needed to sign up to subscriptions on-line are as follows:
-
Select the length of subscription you require
-
Select your means of payment
-
Click on the link 'I have read and understood the general conditions of sale and I accept the terms'.
The general conditions of sale are displayed in a new window
-
Tick the box 'I have read and understood the general conditions of sale'
-
Click on the Validate button
-
The secure on-line payment page is displayed
-
Select your payment card type
-
Enter your card number, expiry date and the 3 digit security code which can be found on the security strip on the back of your card
-
Click on the Validate button
-
The site's home page opens and you can look at the chargeable documentation to which you have subscribed.
You will receive by mail the invoice corresponding to your subscription
| | |
| You have the possibility to look at your subscriptions directly on the website
All of your invoices are kept for 12 months.
For more information, go the help ' Consult your invoices' in the section 'Manage your client account'.
| |
| | |
| |
| | |
|
| Subscribe by order slip/voucher | | |
|
| | |
| The various steps needed to subscribe to documentation by order voucher are as follows:
-
Click on the link 'Download your order voucher'.
-
A speech window opens, click on the 'Register' button
-
Choose a folder on your computer in which to save the file
-
Click on the 'Register' button
-
A new speech window opens and displays the progress of the download
-
Once the download has finished, a final speech window opens, click on the 'Open' button
-
The order voucher in Excel format opens
-
Fill in the order voucher and send it by fax to the number given
-
Your request will be dealt with as quickly as possible
| |
| | |
|
Ordering Parts
Accessing the basket
| Accessing the basket | | |
|
| | |
| You can access the basket in 2 different ways:
-
By clicking on the Basket icon in the top right of the screen

-
By moving your mouse over the tab
«
Purchases of services
»
then selecting the link
«
Ordering
»
| |
| | |
|
Choose your parts
| Choose your parts | | |
|
| | |
| You have the possibility to select parts that you wish to order by making your choice from the spare parts documentation and then adding them to your basket.
The spare parts documentation allows you to select precisely the part you need and gives you the option of filtering by product line or even by chassis number.
| | |
| For more information on the use of Spare Parts Documentation and on the Basket, go to the specific help screens for the two subjects.
| |
| | |
| |
| | |
|
Placing an order
| Pre-requisites for placing an order | | |
|
| | |
| Once registered on the Service Box site, you may place your spare parts orders on-line.
Ordering can be done only if you are linked to a Peugeot official replacement parts distributor.
To do this, you should contact your Peugeot official replacement parts distributor and submit your dealer code.
This will allow you to be added to his list of Service Box clients and you will receive your orders automatically.
Payment for the order is dealt with directly with your distributor.
| | |
| For more information on ordering spare parts, go back to the basket and click on the 'Help' link in the top right of the screen.
| |
| | |
| |
| | |
|
| Retrieving your Service Box point of sale code | | |
|
| | |
| Here below are the different steps needed to retrieve your point of sale code:
-
Connect to the site
-
Go to the 'My Account' tab and select the link 'My Point of sale data' from the drop-down menu.
-
On the 'My Point of sale data' page your Point of sale code is displayed in the first frame.
| |
| | |
|
Manage your client account
Managing your personal data
| Accessing your personal data | | |
|
| | |
| At any point, you can consult/modify your personal data (surname and first name of registration, address,...).
Here below are the different steps needed to be able to look at your personal data:
-
Place your cursor on the 'My Account' tab
-
A drop-down menu is displayed
-
Click on 'My personal data'
-
The page comprising of all your personal data is displayed
| |
| | |
|
| Modifying your personal data | | |
|
| | |
| You can modify certain items of personal data directly on-line.
Here are the different steps you must take to modify your personal data:
-
Go to the page 'My personal data'.
(For more information on access to the page, see the previous paragraph)
-
Click in the field to be modified and enter the corresponding information.
-
Repeat this process for all the information that you wish to modify.
-
Click on the 'Validate' button to register your modifications.
If the information entered does not correspond to our verification criteria, an error message will be displayed at the top of the page
You will also need to correct any incorrect fields and click again on the 'Validate' button
Neither your profile nor your country can be modified on-line.
If you must make a change to this information, please ask for assistance.
The details for obtaining assistance are available by clicking on the link 'Contact' in the top right of your screen.
| |
| | |
|
Manage your point of sale data
| Accessing your point of sale data | | |
|
| | |
| At any moment, you can consult/modify your point of sale data.
Here, below, are the different steps necessary to view your point of sale data:
-
Place your cursor on the 'My Account' tab
-
A drop-down menu is displayed
-
Click on 'My point of sale data'
-
The page containing all your point of sale data appears
The point of sale data comprises:
-
Your point of sale code to communicate to your distributor to allow your parts orders to be processed.
-
The VAT rate that you have applied to your labour
-
The labour rate that you invoice for each operation
You can configure your VAT rate aswell as your labour rate to produce your quote according to the operations described in the documentation ' Methods/Time Scale'.
Your printable estimate will be available in the Basket.
The 'Methods/Time Scale' documentation is a chargeable service accessible via the 'Subscribed Services' tab.
| | |
| For more information concerning the Time/Method Scale documentation, the Basket and the method required to produce estimates, go to the specific help for the two subjects.
| |
| | |
| |
| | |
|
| Modify your VAT rate | | |
|
| | |
| Here below are the various steps needed to modify your VAT rate:
-
Go to the page 'My point of sale data'.
(For more information on accessing the page, see the previous paragraph).
-
Click in the field corresponding to the VAT rate (second frame on the page)
-
Enter your rate
-
Click on the 'Save' button on the right of the entry field.
| |
| | |
|
| Manage your labour rates | | |
|
| | |
| You have the possibility to add, modify or delete your labour rates
If you wish to add a rate, here are the actions you need to take:
-
Go to the page 'My point of sale data'.
(For more information on accessing this page, see the paragraph 'Accessing your point of sale data').
-
Click on the 'Add' button (third window on the page)
-
Three new entry fields appear
-
Fill in the first field:
code (for example M1,T1,...).
The code must correspond to the type of work described in the Time/Methods Scale documentation.
You can retrieve this code in the Time Scale form which is displayed when you select an operation to perform on part of a vehicle.
The code is displayed on the form in the column 'Rate'.
For more information, you can go back to specific help in the 'Time/Methods Scale' documentation.
-
Fill in the second field:
Wording
The wording is your correct description of the operation.
-
Fill in the last field:
price, which corresponds to the price that you charge for this operation.
-
Click on the 'Validate' button underneath the entry fields.
If you wish to modify a labour rate, please complete the following steps:
-
Go to the page 'My point of sale data'.
(For more information on accessing this page, see the paragraph 'Accessing your point of sale data').
-
Click in the labelled field or in the price field of the rate you wish to modify
-
Make your correction
-
The 'Selection' box to be ticked corresponds to the rate automatically ticked
-
Repeat the operation for all the rates that you wish to modify
-
Click on the 'Update' button
All of the modifications made for the selected labour rates will be saved.
If you wish to delete the labour rates, here are the actions you need to take:
-
Go to the page 'My point of sale data'.
(For more information on accessing this page, see the paragraph 'Accessing your point of sale data').
-
Tick the 'Selection' box which corresponds to the labour rate you wish to delete.
-
Repeat the operation for all of the rates that you wish to delete
-
Click on the 'Delete' button which can be found under the list of your labour rates.
| |
| | |
|
Modifying your password
| Modifying your password | | |
|
| | |
| Your new password must consist of 5 to 10 characters and must not use special characters.
Here below is the list of operations needed to modify your password:
-
Place your cursor on the 'My account' tab
-
A list appears
-
Click on 'My Password'
-
The modification of passwords page opens
-
In the first text field enter your new password
-
In the second text field enter your new password again
-
Click on the 'Save' button
| |
| | |
|
Real driving emission
Real driving emission
| Real driving emission | | |
|
|
New registration
Presentation
| Presentation | | |
|
| | |
| This document presents the obligations arising from the application of regulation UE 1244/2021, relating to access to repair and maintenance information (RMI) for Independent Operators (OI)
. .
European legislation obliges each Independent Repairer to be identified as an automotive professional
.
Each Independent Repairer (new or existing) must follow a path where he must enter or confirm his company's data
.
This new process will also make it possible to access to the public Service Box et Technical Information portals with a single identifier
.
| |
| | |
|
Migration process
| Migration process for existing users | | |
|
| | |
| At each connection, the system will inform the user that he must perform a reconciliation
.
The migration process retrieves your account information from Public Service Box so you don't have to re-enter it
.
However, it will be necessary to check that the data below is correct, you can modify it if necessary
.
•
Company name and related fiscal data
:
Intra-Community VAT code (for Europe) or other codes from the Chamber of Commerce (for countries outside Europe)
•
Site address
•
Activities
•
User data (only for legal representatives)
:
Telephone number, Last name, First name, Address
This process must be carried out by the legal representative of the company, the Intercommunity code and a valid email address will be required in order to finalize this process
.
| |
| | |
|
Prerequisit
| Prerequisit | | |
|
| | |
| To migrate your account, you will need the following data (to be verified before September 10, 2023)
•
A valid email address (very important to recover your password)
•
Your company's intra-community VAT code
| |
| | |
|
|